Showing posts with label additions. Show all posts

Monday, July 19, 2010

The thermometer I soldered doesn't work

Yesterday I bought a second soldering iron, as well as solder and rosin flux.

I spent two hours soldering all the parts onto the circuit board. The most time it took me to solder the connectors that are used for temperature sensors and power supply.

The set was high quality do it yourself, but required also a high level experience in soldering. Many parts needed to be soldered on both sides of circuit board. I thought it was enough to use much flux so than the solder would cover the metal legs of the parts on the both sides of the board. I was wrong.

Anyway, I had two hours of great time (I love doing such stuff), but in the end the termometer didn't work as it's supposed to. Something did work but also something didn't, as you can see on the photo below:


So I ordered another thermometer, electronic one as well, but this time a completed device, not a diy kit. ;)

Wednesday, June 30, 2010

new electronic gadgets

Month ago I ordered two cool electronic gadgets that will be installed in my RV/camper Vanagon. Both are electronic kits to be assembled at home in a DIY fashion. I like soldering such kits and that's why I ordered them in such form (I might purchase them already put together).

The first is a electronic thermomether, capable of measuring temperatures in two points, with two sensors. It has two-colored LED display, one color displays the first sensor's temperature, the second the other.

Why do I need such thermometer?

I always wanted to know the inside and outside temperature. To know how cold it is in the evening and how warm it is inside my camper. One of the sensors will be installed inside, probably will be attached to one of cabinets. The other I will attach to the radiator or the coolant hose to measure also the temperature of water reaching the radiator. I am not certain if my cooling system works properly, so I need something that will let me know if it fails. The original temperature gauge is not enough -- I destroyed one engine while looking only at this gauge.

Sunday, April 25, 2010

New tires

Since I bought my camper in 2006, I never bought any tires. Last year I bought four wheels (winter tires and rims). Since then they spent 6 months in storage, and two of them were installed on the rear of my camper last fall, when I had to replace one broken summer tire.

Two weeks ago I ordered two new tires, Barum Vanis, that will be installed on that rear axis.

I need to replace them before the next weekend. May the third is one of polish national hollidays, so it will be a three-day weekend. It's too cold for any camper trip without internal heating source, but we're going to my parent's cottage. I don't want to drive there on winter tires.

Today we visited my parents-in-law in their summer home, because I wanted to tidy the camper a bit for the season. Last week I removed most of the garbage from inside and ordered all the equipment that I carry with me in the proper places. But I have much more to do.

Thursday, August 13, 2009

Solar power 1

This is an english translation of an article that was posted originally on the polish version of this blog on june 22nd.

With a bit of help from my father-in-law I managed to work on my solar power system couple days ago. Today I finally managed to write a post about it with some photos and schemes. I want to describe the current status of the solar power system, and to write a bit about the future of the system.

According to our plans, we're going on the first part of our summer holiday on july 6th, the next monday. I don't have much time to finish the work with supplying all the electrical devices with electricity from the solar panels.


From Volkswagen Transporter T3
The first thing I did was to put two gel batteries in one of the cupboards of the camper. I wanted to fit them under the driver's seat, but there's no enough space there. I connected the batteries (parallely) to the solar charge controller, unfortunatelly using cable with cross-section much smaller than suggested by the controller's manual. The controller can be seen on the right hand side of the photo -- it's the black plastic thing hanging on the white wire.


On the second solar panel my father in law soldered two connectors -- male and female, one will be used to supply power to the charge controller and the second to connect the two panels together (parallely).


Here you can see the cable from the panel connected to the one from charge controller.


The solar panels aren't attached to the roof yet. In order to use them, I'll have to manually put them in sunny place...


...and connect together. This was the best I could do. Until they're permanently fixed to the roof, I won't connect them permanently to the charge controller.

To be honest, I have two independent solar power systems. Two sets of batteries, two charge controllers, two sets of solar panels. The scheme of all this looks the following:


On the left hand side of the drawing you can see the new solar power system: two solar panels, 40 W each, and two gel batteries, 38 Ah capacity each. On the right hand side, the old solar power system, the old solar panel (10 W), old charge controller and old battery. At the moment, all the appliances (shown as an icon of electrical bulb) are connected to the old battery, using quadruple cigarette lighter socket.

"reg.ład." is a short for regulator ładowania -- solar charge controller.

I want to add a couple of extra parts to the system and make it look the following:


The most important part of this system is the set of two gel batteries, charged with the two solar panels. To this solar charge controller I will connect all the camping appliances: radio, lights, fridge, water pump. The older part of the system will work as emergency energy source, will be connected manually to the rest of the system.

Directly to the batteries I will also connect:
  • inverter, shown as 12-230, that will supply 230V AC power to my laptop computer and TV tuner,

  • gel battery charger, shown as 230-12, that will charge the batteries whenever I will have the 230V power supplied to the camper from external source,

  • additional battery charge controller, SLA40, that will start charging the gel batteries when the alternator makes enough electricity.


Most of the appliances must be connected via charge controller, that will disconnect them when the voltage in the battery drops below safe level. The inverter has this security measure built-in, so it might be connected to the batteries directly.

I already have the inverter, the 230V charger and new wire to connect it all (4mm² cross-section area - 12 gauge!).

Wednesday, June 10, 2009

Preparing solar panels

As I mentioned here already, I plan to power all my camping electric needs with solar power. That's why I bought two 40 W solar panels with solar charge controller in february. Since we plan to spend three days living in camper during this weekend (starting on friday), I need to put everything together. Even if it all will be only temporary.

On monday I bought two gel batteries, 38 Ah capacity each. They look just like ordinary car batteries, only the connectors are different. Even the weight is similar -- those weigh 13 kg (29 lbs) each.

From Volkswagen Transporter T3
Today I spent about an hour soldering the cables together. The most important task was to solder the cable to the second solar battery (the first is already in the camper). I am not good at soldering, you can easily tell after a look at the photo below.


A bit about the cables I used here. The solar charge controller's manual recommends using a cable that has area of cross section of 4 mm2 (AWG 12), but I only had 2x0,75 mm2 cable for loudspeakers. So I used two pairs of this cable, removed the isolation from the ends and twisted the wires together. When I buy the proper cable, I'll connect it to the small parts of the cables I soldered now.

To the end of the cable from the solar panel I soldered a male connector used in RC toys and airsoft replicas. The connector is supposed to withstand the current of even 30 A, a lot more than I plan to put through it. 30 A with 12 V voltage is over 3 kW, and my solar panels give only 90 W (2x40 W and a small 10 W panel).


The female connector I soldered to the cable from the solar charge controller. I bought this cable yesterday, not the one I would like to have, but I had simply no choice. When I buy the proper cable, I'll simply replace it.


The same cable will be used to connect the charge controller to the batteries. I connected two pairs of wires to the controller as the batteries will be connected paralelly.


I left two things to do tomorrow in the camper:
  • solder the connectors to the cables attached to the solar panel I have in camper,
  • find a place for the batteries,
  • connect the controller with the batteries.
I wonder if the soldering iron will work with the 12/230 V AC/DC converter I have in the camper and the battery that's used there now.

Thursday, May 7, 2009

New stuff in my camper

Last week we had the last wednesday of april. The last wednesday of each month is a time when group of VW T3 (T25 / Vanagon) owners from Warsaw meet at 8 PM. As Tomek already has his T3, we decided to attend the meeting for the first time. I drove my camper to work in the morning and at 4 PM (after work) drove to Tomek. We wanted to install a couple of things to my camper, scavenged from my second Volkswagen -- a red/cherry multivan I bought two years ago to donate its engine and gearbox.

First of all, I wanted to install the speedometer with odometer. The one I have in my camper was broken -- I fixed it but it broke down again. We couldn't swap them as the wire that makes the odometer work was connected to my speedometer with thread and the one from multivan had only snap connection. We will also change the wires in near future. When the meters were removed, Tomek installed me two small details -- parking break indicator and one small green light that is supposed to indicate something when you tow a trailer. They were not connected, though. We plan on replacing the entire front board with the one from the multivan -- it is of very nice brown color, with light brown upholstery on the floor and air distribution canal between the seats. For now we only took the steering wheel from the multivan and installed it into my camper -- now I have smaller, thinner brown wheel with large button for car horn. The one I had before had the button broken.

I also replaced the two little thingies that hold the foldable shades above the windscreen. Unfortunatelly I have no idea what are the names of both. The camper had those thingies broken, so it needed to be replaced.

I scavenged a fluorescent light from the multivan and will install it soon to the camper's roof cupboard (the one above the bed). It'll be used for reading and in case of emergency repairs of the engine.

And finally -- I got another (3rd) chrome hubcap. I need only one more -- this one was found by Tomek's fiancee.

I will post here photos when I resurrect my Picasa and upload those photos to the web album.

Today I checked the pressure of the summer tires I installed recently. As usual it was well below the correct value. It should be 2.7 and 3.3 atmospheres on the front and rear axle and was 2.0 on both of them. Now it's 3.0 and 3.5, respectively, as I always liked to inflate the tires a bit more than the recommended pressure. It helps to save fuel. ;)

Friday, February 20, 2009

Buying winter tires

Today my daewoo lanos (the car I use every day) couldn't start when at -6,6°C the battery didn't supply enough current to the starter. So I had to drive to the railway station (I go to work by train) with the camper (the van I use on weekends). The camper had no trouble starting at all. I just turned the ignition switch, waited 20 seconds for the glow plugs to warm the engine and started it easily.

I only had small trouble parking the van near the train station. I couldn't drive left front wheel on the sidewalk through the curb as it just slid along it's frozen surface. I had to back up a little and cross the curb in another place.

I think I will buy a set of winter tires. Not because driving on snow and mud in winter on summer tires is dangerous. I had trouble with the camper only once, when the rear wheels lost the grip as I changed the gear (used clutch too fast). I am aware of those dangers so I drive slowly. But I want to buy those tires because I want to avoid getting stuck in snow. ;)

Thursday, January 22, 2009

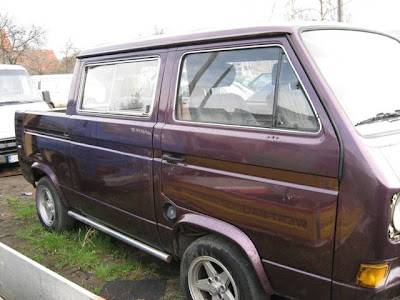
Cool stuff on eBay: hubcaps

With this article I'd like to start a series of posts on cool Vanagon stuff on eBay. Today part one of the series: the hubcaps.

Hubcaps for VW T3
VW TYPE 1 2 3 4 HUB CAPS BEETLE BUS vanagon GHIA late

Only $79 for a set of four. Shipping to Poland -- not specified.

Chromowane pierścienie do felg
VW VANAGON WESTFALIA CHROME WHEEL RIM TRIM RINGS 14

Beautiful set of chrome wheel rim trim rings. Those are used to decorate the outher part of the rim. You can even see the notch for the valve. A set does cost $39. Shipping to Poland is $50.

All those hubcaps and rings are for standard 14 inch Volkswagen steel wheel rims.

Sunday, December 28, 2008

Solar battery charging

Everyone knows what happens to car batteries if the temperature is below freezing (0°C, 32°F). They don't give any power to the starter. From the scientific point of view their capacity drops a lot when it gets colder. For the driver it means one -- he can't start his engine and has to walk in the cold. It is especially difficult for diesel engines as they need to be warmed by glowplugs before they can be started and need a lot of torque in the starter (as they have high compression ratio).

Since I have my camping solar set, I wanted it to charge the battery that's used to start the engine.

My solar set consists of the solar photovoltaic panel, auxillary battery (under the passenger's seat) and a charge controller. This controller has three sets of connectors: source of power (to charge the battery), the battery and the devices to be powered from the battery. If the voltage in the battery is high enough, it allows the devices to use electricity. If not, the devices are disconnected.

I used the third set of connectors and attached a plug that's compatible with cigarette lighter sockets. If sun is shining, it charges the auxillary battery along with the standard one.

That's why when I leave my camper on the guarded parking near my apartment, I leave the solar panel under the windscreen. And why I chose a parking space with a lot of free sunlight.

From Volkswagen Transporter T3

Sunday, December 21, 2008

Gettin ready for X-mas

The Christmas is on it's way, so I decided to add some christmas spirit to my VW T3.

I used the camping battery, the DC/AC inverter and a timeswitch. Ans a set of 50 lightbulbs. I connected the inverter to the battery and turned it on. Then I plugged the timeswitch and the lights to the switch. I set the switch to turn the lights on for half an hour between 8 PM and 8.30 PM. I set the whole thing at 1 PM.

I came back to the camper later, around 8 PM, to make a photo of the christmas decoration. But it wasn't lit. Why? Because the inverter drained the battery by just powering the time switch. So I connected the solar charge controller to the engine battery (just like the camping battery was charged by solar panel) and turned the lights on.

From Volkswagen Transporter T3

Saturday, October 4, 2008

New front turn signals

Some time ago I found on one of polish internet auction sites a set of white front turn signals, coupled with position lamps. They were prices as high as PLN 200 ($82, but closer to $70 then) and I thought that someone must be insane to sell them at such price.

Three or four weeks ago I was scrolling through Ebay and I found so called VW Vanagon T3 80-92 clear corner light lenses and bought two sets. One clear, one dimmed (smoked). I wasn't sure which will suit my camper best.

They arrived on thursday. I just came home after installing a set. Would you guess which one I installed?

From Volkswagen Transporter T3
Lenses as taken from the boxes.


The clear lens, mounted on the right side.


The smoked lens, mounted on the left side.


Both lenses while hazard flasher is on.

The white looked very nice, as large part of my camper is white.
The smoked also looked nice, as some parts in front of the camper (grilles, bumper) are black).

And the winner is:

The clear, of course!

I will sell the smoked lenses to someone here. :)

Sunday, August 31, 2008

New pump and faucet

So I have new water pump and faucet. Nothing very difficult, just some $50 spent, two pair of wires cut and new devices soldered.

There'll be only one photograph. These are the pumps: old versus new. The red is obviously the old one. ;)

From Volkswagen Tr...


The new faucet looks exactly the same as the old one. But works differently.

The old one had to be turned clockwise to start the pump. At first the turning caused the valve to be opened, further turning started the pump.
The new one needs to be turned counter-clockwise. Like ordinary faucet or any other valve. :) Turning the valve starts the pump and after some further turning the valve is opened.
Small diferences, but mean a lot...

See for yourself. :)

Saturday, August 9, 2008

Holidays in Kolobrzeg - photo summary

I posted here some info on our summer holidays near Kołobrzeg. Now it's a good time to summarize the entire trip. I always liked photos and made some, so I'll post selected photos as a good summary.

From Volkswagen Tr...

You can see here the camper's cupboards filled with food and clothes. We hardly managed to put everything inside. :)


I like this closet, 'cause it allows the clothes to hang almost freely. And it is really huge (compared to space in my VW T3). I think I'll add a mirror on the inside of the door.


Bikes attached to bike mount. If you'd like to buy such bike mount, contact me, I have one spare. :)


This 12V->230V electricity inverter is an important part of my camper's electrical equipment. But on this photo it was used by my dad to charge his cellphone from his camper's battery.


The bed is large.


The first evening.


The first evening (cont).


Mig-21's we saw on our way to Borne Sulinowo, on an airfield close to Nadarzyce.


In the Borne Sulinowo. These buildings were part of russian military base.


Second day of our trip, road somewhere between Borne Sulinowo and Kołobrzeg. It's a result of asking GPS software to find the shortest route. As you can see, the road was very narrow. I was glad we didn't have to pass any other cars... :)


That's me, removing the back cover of my fridge.


Faucet.


The back of the fridge. You can see how precise the removal of cupboard's back was. You can also see my camping battery and solar charger.

Monday, June 23, 2008

Getting camper prepared for summer trips

Since it's already summer on the northern hemisphere, it's time to get camper ready for any summer trips. Since it was broken last year, we missed our opportunity to go somewhere with camper and had to use my daewoo lanos and sleep in a tent instead. My Vanagon camper is at this moment operational, but not yet prepared.

First of all, we need to change the engine oil. The engine is at it's break-in (it was put together not more than 500 km / 300 miles ago), so the oil needs to be changed.

Second important thing (I'd say it's the most important on the to-do list) is to find out why the engine leaks oil. I have to determine at what rate the oil is being lost. I can go somewhere with leaking engine, but I have to be sure when to pour some extra oil in the engine. I also need to know that this leak won't become greater after some time... We guess that oil leaks from the turbine.

Those are the two most important things. But there are some other things that need to be done or should be done. Or even could be done.

The less important things are:

  • install some new speakers in the camper's doors,
  • put together the rest of extra wiring for leisure electric devices,
  • get a new camping battery, preferably a gel type battery,
  • check if the camping 230V electrical wiring works fine (I bought today on the internet an interface that can be used to connect the camping plug to standard socket that can be found on polish campsites).
We plan on going to Kołobrzeg somewhere around july 24th. On 25th-27th there's Sunrise Festival - a well known polish house and trance music festival. We plan to go see Armin van Buuren and Markus Schulz on 25th. After that we'll probably stay there for a couple more days, to sit on the beach and sunbathe (we could even go swimming!), or go somewhere else and stick around there. We'll probably take our bikes along (good thing I have an original bike rack for Vanagons (actually I have two of them -- interested in getting one?)) or do something else for fun.

On this weekend I plan to visit my parents in their summer retreat, and work a little on the camper. On thursday I am going to meet Tomek and take a look into the engine. We'll see what we'll come up with.

Saturday, May 10, 2008

I have to complain...

I am not satisfied with today at all. So I'm going to complain here, maybe I'll feel a bit better. ;)

Somewhere around the 12 PM we went to Jeruzal, where I own a piece of land I want to build a house on. Nothing worth mentioning. We visited my future brother-in-law and then to my future parents-in-law. As last time -- to eat and to work on my camper.

I planned for today the following:

  • install the CB-radio speaker,
  • install the lighter plug sockets (the one I mentioned in april),
  • check the tire pressure,
  • check why the camping water pump doesn't work.
During this trip my gearbox lever broke. Before I finally found out how this mechanism works I wasted more than 20 minutes. I thought that the lever disconnected itself from the horizontal rod that changes the gears in the gearbox. I lowered the box that holds the spare wheel, didn't see a thing, went back inside the camper and finally was enlightened! It is held by some spherical hinge: a ring with spherical inner surface is fitted to the floor, two halves of a sphere (and a spring between them) are attached to the lever.The upper sphere half had to be pushed against the spring to touch the lower half, then both of them had to be pushed inside the ring.

When I arrived at my destination, I started to work on the speaker. The amount of work is difficult to describe. First I had to find a hole to put the cable through. Then find a good spot to attach the speaker itself, using three bolts. I drilled 3 holes, screwed on one bolt, the second broke. I decided to use 2 bolts instead of 3, enlarged the third hole and broke another bolt while trying to screw it on! So I had to make another 2 holes, this time big enough. I broke only one drill... The cable was put through the hole next to gearbox lever.

The speaker does work very nice, especially when I turn up the microphone gain knob.

The lighter plug sockets were attached almost immediately. I cut the plug, removed the cables from solar charge controller, connected the cables with the ones from the socket, attached again to the controller. I had in mind connecting a long cable that'll be later used to power additional stuff in the back of the camper, but left it alone for today.

The work with the pump was even easier, 'cause it wasn't broken. When I turned the faucet knob, the water flushed from below the faucet. So I thought that I have to find this leak and seal it with something. I decided to remove the entire sink / stove plate from the drawer, to take a look from below. I removed 8 bolts that held the sink / stove. I couldn't lift it. So I removed two nuts that attached the gas valves to the metal plate, bolted to the drawer, and eventually the metal plate itself. Nothing changed. I tried to disconnect the metal pipe that fed gas to the valves, but unsuccesfully. Then I took a good look inside and found out that the faucet itself prevented the sink / stove from being moved! So I tried to disconnect the metal element that secured the water hose on the faucet. When I removed it I still couldn't remove the hose.
And then I saw where the water came from. The faucet's arm was made a hollow pipe and one of the holes was closed with some plug. This plug was missing. I made a temporary plug out of pencil rubber.
I didn't have to waste an hour to see where this water comes from...

And of course I forgot to check tire pressure.

Photos will be posted later.

Sunday, May 4, 2008

Yesterday we (me and my camper) had a very busy day.

First of all we went to visit my piece of ground, I had couple of things to do. The most important was to plant the christmas tree we had in a pot on our balcony since christmas. It had to wait so long because I wanted to carry it with my VW T3, not with my Daewoo Lanos...


Then we went to my future parents-in-law home to eat some lunch. But as I arrived there with my Bus I thought that I might do something with it.

I started with the right mirror. Since I bought the bus I wanted it to have spherical mirrors. I just didn't want to wait to get them from my second, red Transporter. (The VW T3 multivan I want to sell). Since I already had the mirror glass itself, I decided to change the glass only.

It wasn't difficult, it just needed a little work with the help of screwdriver and glue.

From Volkswagen Tr...
We removed the front frame that holds the glass to the back of the mirror. The glass was replaced with the spherical one. The notch in the back part of mirror casing was filled with glue, the front frame was attached and the entire mirror was left in the sun to dry the glue. Of course with proper weight to hold it all together.


Then it was time for the CB radio. My future father-in-law wanted to sell his CB and I needed a new one. I didn't want to spend the money he wanted to get, but somehow we managed to deal. I paid for it PLN 300 ($135) and promised to mow his lawn twice. ;) I wanted to buy a CB with PA (loudspeaker) function. The speaker itself I already purchased, I just need to get it from the near post office. ;)


I also looked into the engine compartment and saw that one of the vee-belts is broken. I wonder if it is used for any important feature... Now the T3 has only one vee-belt. ;)


I found some oil spots under the camper. I made two photographs to find out where it's leaking from. I suspect it's leaking through the turbocharger...


Thursday, April 24, 2008

Shopping for camper stuff

Tomek promised me, that I'll get my T3 Camper this week. Yesterday, today, tomorrow... On monday guys from the repair shop were supposed to put the engine into the body, because they had their lift repaired. Tomek went to Germany and will be back tomorrow, I guess they didn't do anything with the T3 and I'll probably get it next week.

Nevertheless, I ordered some stuff at Allegro.pl (the same thing as Ebay, but polish). I bought some stuff that I want to be installed in the T3.

First of all, I need to get all the electrical wiring done. At this moment all the electrical stuff is powered from the single, mail battery. There's another battery, attached to charger and solar panel (my camping solar set). I want all the camping equipment to be powered with this second battery. I have 12/230 V inverter at home, bought it last summer. I will also do some wiring for 12V devices. CD-player, CB radio, refrigerator, lights, water pump -- it all needs to be powered from the second battery. I'll add two quadruple lighter sockets, they'll be very handy, especially in front of the bus. Cellphone charger, GPS receiver charger, CB radio -- they're all powered with lighter plugs.

I bought some stuff for my CB radio. A new rubber ring for my magnetically-attached antenna. A speaker to be installed below my bus so I can yell at other drivers and pedestrians using the CB's microphone. :)

I have some other things planned for future purchases.
First of all, I need a good secondary battery. If I will have enough money, I'll buy a gel battery of large capacity. Enough to power my laptop computer for two-three days, couple hours daily. :)
I want to replace as many lightbulbs with LED bulbs as possible. Of course, the camping light above table is fluorescent, but the light above driver's head is an ordinary bulb. I want to add some light in the back of the sleeping space -- it'll come in handy when I want to read a book or repair something in the engine space (engine is located below the mattress). The taillights will probably have bulbs replaced with LEDs. I also'd like to purchase some LED daytime running lamps.

We'll see what will happen with my VW T3. I wanted to drive my camper on the first may weekend (we have national holidays on 1st and 3rd of march and because 3rd is saturday our employer gave us also 2nd off) somewhere, but now I don't know if I will do this. I don't think that everything will be done on time. But I bought all the stuff mentioned here, because I have some extra money at the moment. Better shop now, when I have some cash than later. ;)

Friday, April 4, 2008

Home made Vanagon DOKA

Every Volkswagen T1, T2, T3, T4 and T5 owner knows exactly, what is the so called doka -- the van with two rows of seats and open space for carrying stuff.

Today I'll show you doka that's capable of having three rows of seats. The home-made-doka. :)

From Volkswagen Tr...


Inside this doka there's enough space to hold three rows of seats. For now there are two of them. You can add the third. The back of the van is made from scratch, it has new tail-lights and a nice trunk door. ;)

If you'd like to buy this van, go here. Note that PLN 1 = $0.45.

Wednesday, February 13, 2008

Jumping VW T3

I always wanted to have a lowrider. I am the guy who likes to show off a little with the things he owns. So having T3 capable of changing the height of the suspension would be nice. I don't want it to jump as it is shown in the following video. Setting suspension height for driving on a road or off-road would be enough for me.

Tuesday, October 24, 2006

VW T3 tuning on Discovery

Volkswagen busses, including T3s are tuned even on Discovery Channel!

Yesterday I saw two episodes of "Wheeler Dealers" on Discovery Channel. In those episodes the guys tuned Volkswagen T3.

It was a typical cargo van with 1.6 turbocharged diesel engine. Since the show is made in UK, the car has steering wheel on it's right side. They wanted to make a beautiful camper van out of it. It was bought for £1,100, in poor shape. The muffler had many holes, one bumper was missing, the side door was not working properly, stuff like that.

They started with the engine. They replaced the V-belt, glow plugs (the engine didn't start the each time, muffler and oil. Total cost: £160.
The door was fixed. They installed a window (one that can be opened, not like the window in my camper :( ) bought on a scrap-heap for £50.
They wanted the car to look very nice so thought about getting paint done. But instead of painting some weird shapes and patterns with the paint, they bought large vinyl STICKER! Beautiful sticker with some bubble pattern, for £1,000...

The most important thing was to replace the insides of the van. The old upholstery was changed -- they removed old one made of fiberboard and replaced it with plywood. I think they also should put some styrofoam to minimize the heat losses (important while camping in autumn or spring). They installed a folding bed (made from DIY set), the floor was covered with artificial grass. Set of camper furniture pieces (folding table, cupboards with sink and stove). The front suspension was lowered (the springs were replaced with shorter ones), the wheels got polished caps.

Totally the conversion cost was near £4,000. :)

Too bad I didn't have the chance to record those two episodes. :(